Multi-Level VEXing for Releases
Most products are not a single image. A Helm chart for example ships an application container, a web frontend, a database and an identity provider — each scanned separately, each with its own findings. Your customers, however, do not consume four images. They consume one release.
Multi-level VEXing means making the exploitability statement at the level the product is actually shipped at, while the scanning still happens per component. In DevGuard you do this with a release asset: a repository whose artifact carries no SBOM of its own, but references the SBOMs of the components it bundles. Findings roll up into it, and one VEX decision there covers the whole product.
The example
The DevGuard Helm chart bundles four images:
| Component | Source repository |
|---|---|
devguard | API container |
devguard-web | Frontend container |
postgresql | Database |
kratos | Identity provider |
The goal is one release asset, pkg:oci/devguard-helm-chart, that shows the findings of all four and can be
vexed once per release.
Way 1 — Create the release asset in the UI
Good for a first release or a one-off product view.
- Create a new repository in your group and give it the release's name.
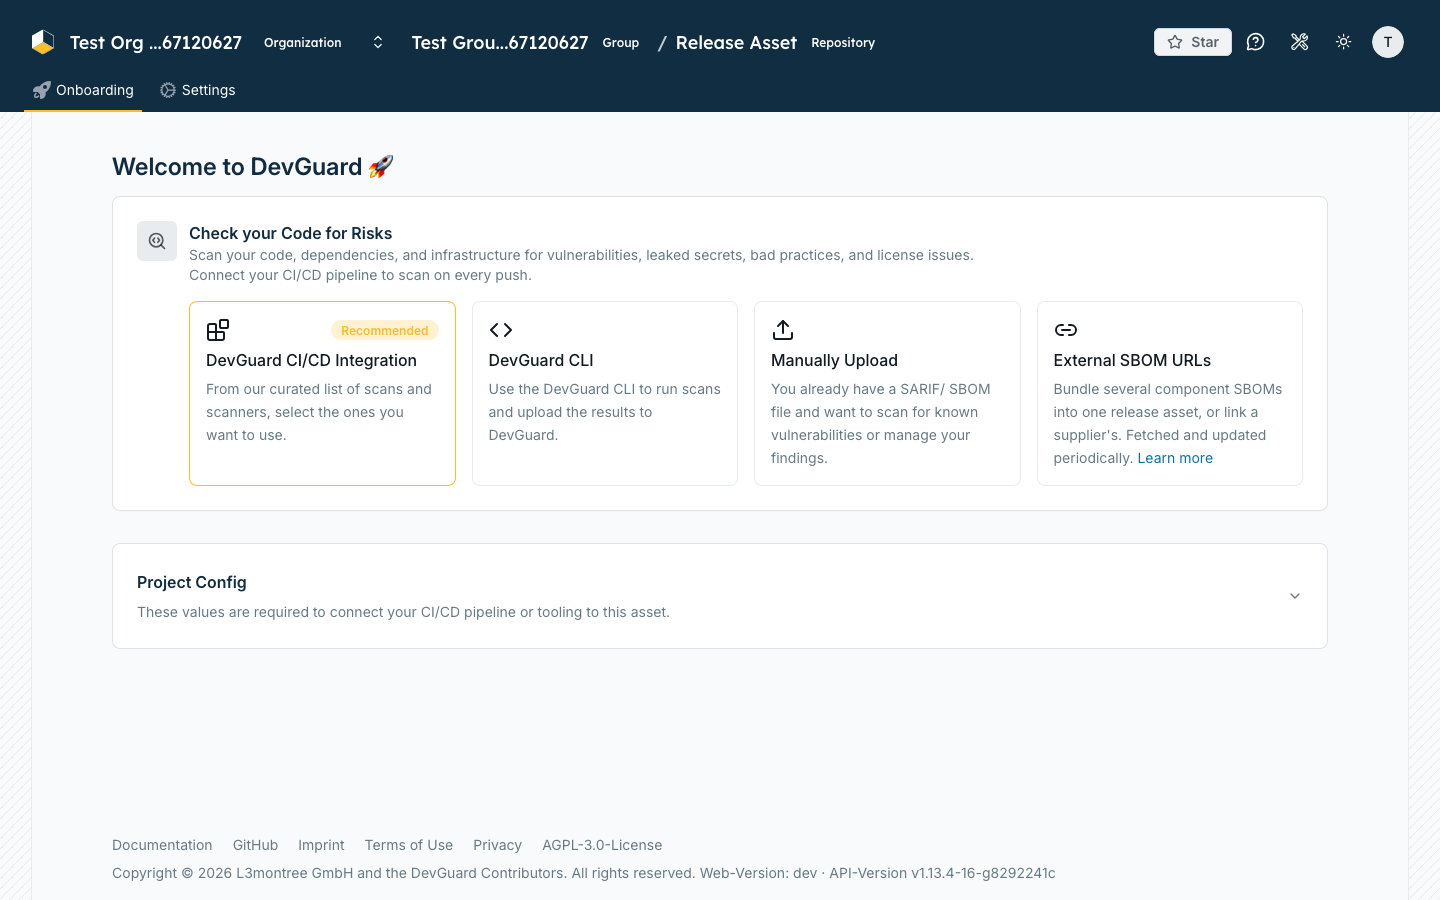
- Click the External SBOM URLs Card and create your artifact with a valid purl.
-
Paste the public SBOM URL of each component. You find it on the component's repository under Settings/Public URLs; the shape is:
https://api.devguard.org/api/v1/public/{repository-id}/refs/{ref}/artifacts/{purl}/sbom.json/
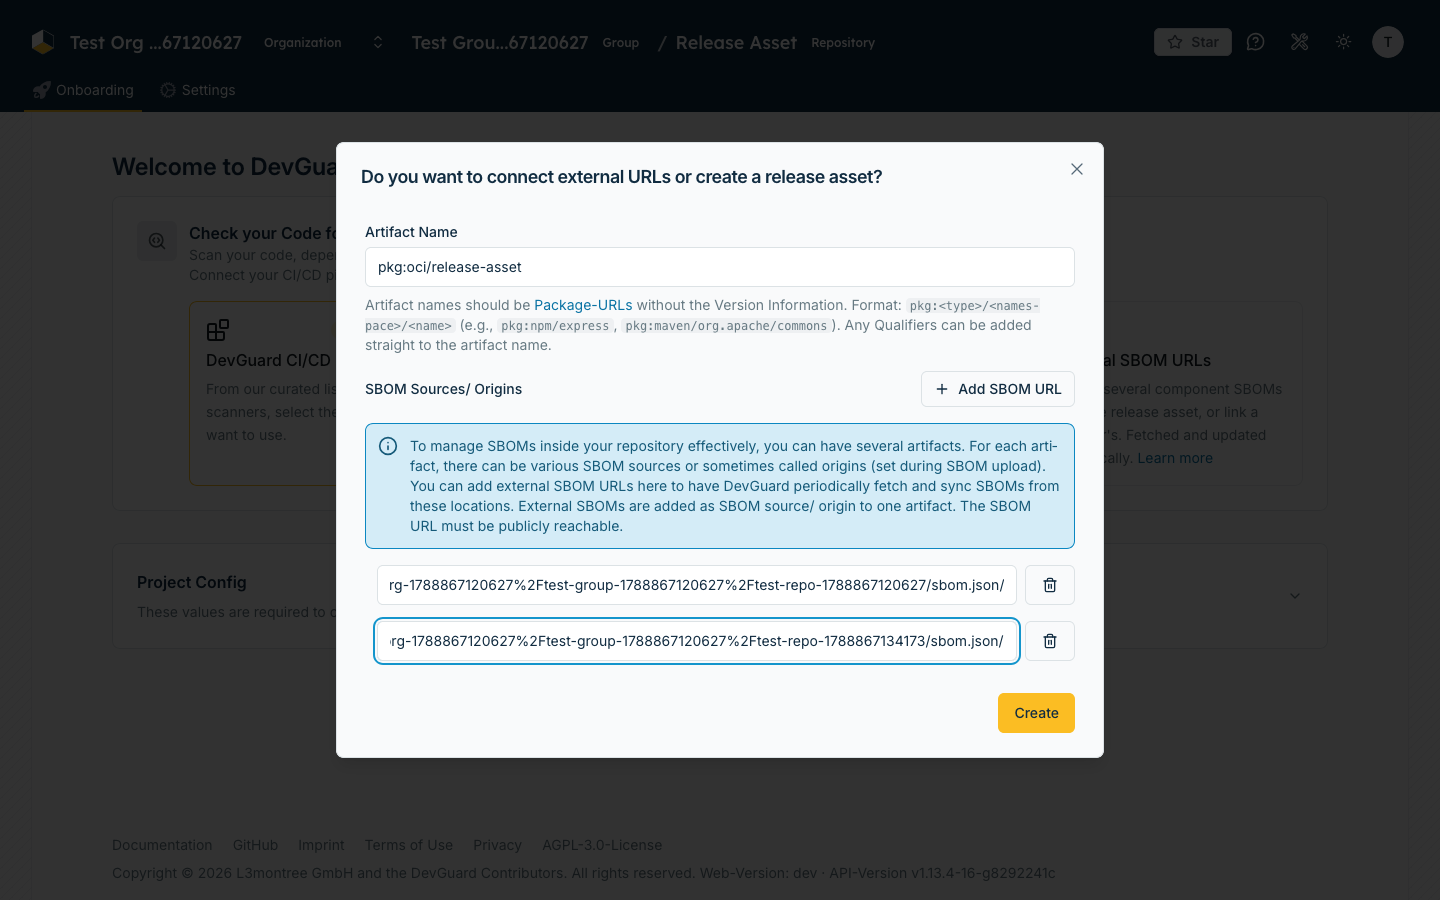
- Save. The release asset now aggregates the findings of all referenced artifacts.
Way 2 — Create the release asset from your pipeline
Let the release pipeline build the URLs. The version numbers are already in the repository — in the DevGuard
Helm chart the API image tag is Chart.yaml's appVersion and the frontend tag is web.image.tag in
values.yaml — so nothing has to be maintained twice.
Step 1 — Generate the artifact definition from the chart
The SBOM URL of a component is fully determined by three constants (its DevGuard organization, its purl name and its registry path) plus the tag that the chart pins. Keep the constants in a small script and read the tags from the chart; the script writes the artifact definition that the upload job posts:
Two details make the URLs work:
- The ref segment is the image tag with dots replaced by dashes —
v1.13.2becomesv1-13-2. That is the ref DevGuard creates when the component pipeline scans a tag. - The purl is percent-encoded as one path segment,
encodeURIComponentincluded for thepkg:scheme and the query part.
The result is exactly the file the API expects:
Step 2 — Add the upload job
The job needs nothing but a DEVGUARD_TOKEN with the manage scope and DEVGUARD_API_URL /
DEVGUARD_ASSET_NAME from the workflow's env. devguard-scanner curl is a custom curl implementation that
signs the request with that token.
The artifact is created under the ref of the running workflow, so each branch or tag of the chart gets its own set of bundled SBOMs and its own findings.
Step 3 — Vex the release
Open the release asset. Findings from all four components appear in one list, each labelled with the artifact it came from. From here everything works as on a normal repository:
- Mark a finding as a false positive or accepted risk — the decision belongs to this release.
- Turn recurring decisions into VEX rules so the next release inherits them.
- Export the VEX or CSAF document for the release and hand it to your customers — one document for the whole product, not four.
Related Documentation
- Create & Manage VEX Rules — carry decisions across releases
- Export & Publish VEX — the document your consumers read
- Import VEX from Files & Suppliers — upstream statements for bundled components
- Sync External Data — how information sources are fetched and what happens when one is removed
- Artifact Concept — what an artifact is and how it relates to a repository
- Branches, Tags & Artifacts — why the ref is appended to the artifact name automatically
- What is VEX? — the concept behind the workflow